
파이썬 OpenCV을 사용해 얼굴을 찾아 모자이크 처리를 하는 예제를 보도록 하겠습니다.
얼굴 위치를 지정해서 모자이크를 만들 수도 있지만 자동으로 얼굴을 검출해 모자이크를 처리할 수도 있습니다.
얼굴 인식은 CascadeClassifier() 사용해 처리합니다.
모자이크처리의 기초 사용 방법은 아래를 참조해 주세요.
모자이크를 하고 싶은 사진을 준비합니다.
예제에서는 아래 사진을 샘플로 사용했습니다.

얼굴을 자동으로 검출해 모자이크를 하는 처리를 보도록 하겠습니다.
import cv2

face_cascade = cv2.CascadeClassifier('C:/Users/Administrator/PycharmProjects/numpytest/venv/Lib/site-packages/cv2/data/haarcascade_frontalface_default.xml')

src = cv2.imread('C:/Users/Administrator/Desktop/python/origin/face.jpg')
src_gray = cv2.cvtColor(src, cv2.COLOR_BGR2GRAY)

faces = face_cascade.detectMultiScale(src_gray)

ratio = 0.05

for x, y, w, h in faces:
    small = cv2.resize(src[y: y + h, x: x + w], None, fx=ratio, fy=ratio, interpolation=cv2.INTER_NEAREST)
    src[y: y + h, x: x + w] = cv2.resize(small, (w, h), interpolation=cv2.INTER_NEAREST)

cv2.imwrite('C:/Users/Administrator/Desktop/python/origin/face_mosaic.jpg', src)
얼굴을 인식하고 모자이크를 하는 처리 대부분이 OpenCV에서 제공하는 것들이라 크게 어려운 부분은 없습니다.
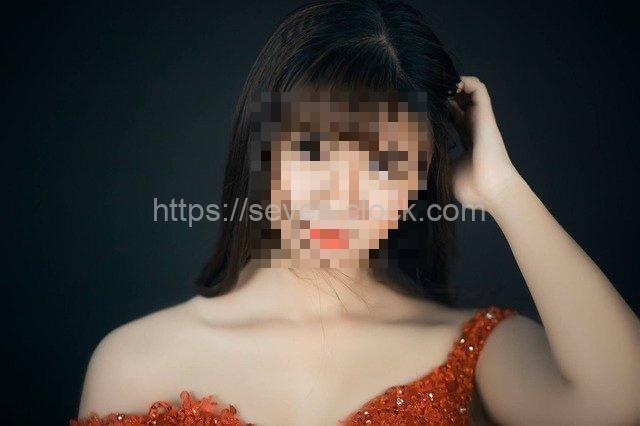
모자이크 처리가 된 사진을 확인해보겠습니다.

얼굴만 모자이크 처리되었습니다.
모자이크 크기를 변경하고 싶은 경우에는 변수 ratio에 값을 조정해 주면 됩니다.
ratio에 0.1을 대입해서 모자이크를 만들어보겠습니다.
import cv2

face_cascade = cv2.CascadeClassifier('C:/Users/Administrator/PycharmProjects/numpytest/venv/Lib/site-packages/cv2/data/haarcascade_frontalface_default.xml')

src = cv2.imread('C:/Users/Administrator/Desktop/python/origin/face.jpg')
src_gray = cv2.cvtColor(src, cv2.COLOR_BGR2GRAY)

faces = face_cascade.detectMultiScale(src_gray)

ratio = 0.1

for x, y, w, h in faces:
    small = cv2.resize(src[y: y + h, x: x + w], None, fx=ratio, fy=ratio, interpolation=cv2.INTER_NEAREST)
    src[y: y + h, x: x + w] = cv2.resize(small, (w, h), interpolation=cv2.INTER_NEAREST)

cv2.imwrite('C:/Users/Administrator/Desktop/python/origin/face_mosaic1.jpg', src)
결과
모자이크 크기가 더욱 작아졌습니다.
OpenCV를 사용하면 모자이크 처리 외에도 사진 파일을 간단하게 편집 조작을 할 수 있습니다.
댓글